Add Hidden Fields: Elementor Forms
This guide explains how to use Elementor Forms to collect data, pass hidden parameters (like UTM, user IDs), connect submissions to a CRM, and embed the form via iframe if needed. Elementor’s built-in form widget makes it easy to create modern, styled forms directly within the page builder.
Step 1: What is Elementor Forms?
- Elementor Forms is a widget available in Elementor Pro that allows you to create forms visually using the drag-and-drop interface.
- Requires: Elementor Pro (not in the free version)
- Use Cases: Lead generation, contact, quote request, survey
- Built-in Integrations: Mailchimp, HubSpot, ActiveCampaign, Zapier
Step 2: Where Can Elementor Forms Be Created?
- Navigate to Pages → Add New or edit an existing page with Elementor.
- Click Edit with Elementor.
- Drag the Form widget onto the page.
- The form editor will appear in the sidebar.
Step 3: How to Create a Form in Elementor
- Open a page in Elementor editor.
- Drag the Form widget to the canvas.
- You'll see a default form with 3 fields: Name, Email, Message.
- Customize the fields by clicking on each one. You can set:
- Field type (text, email, textarea, etc.)
- Label and Placeholder
- Required toggle
Click Publish or Update the page.
Video: Step-by-step walkthrough
Step 4: How to Add Hidden Fields in Elementor Forms
Hidden fields are essential to capture metadata like UTM parameters, campaign IDs, or user identifiers.
Step-by-Step: Add a Hidden Field
- In the Elementor Form widget, click “Add Item”.
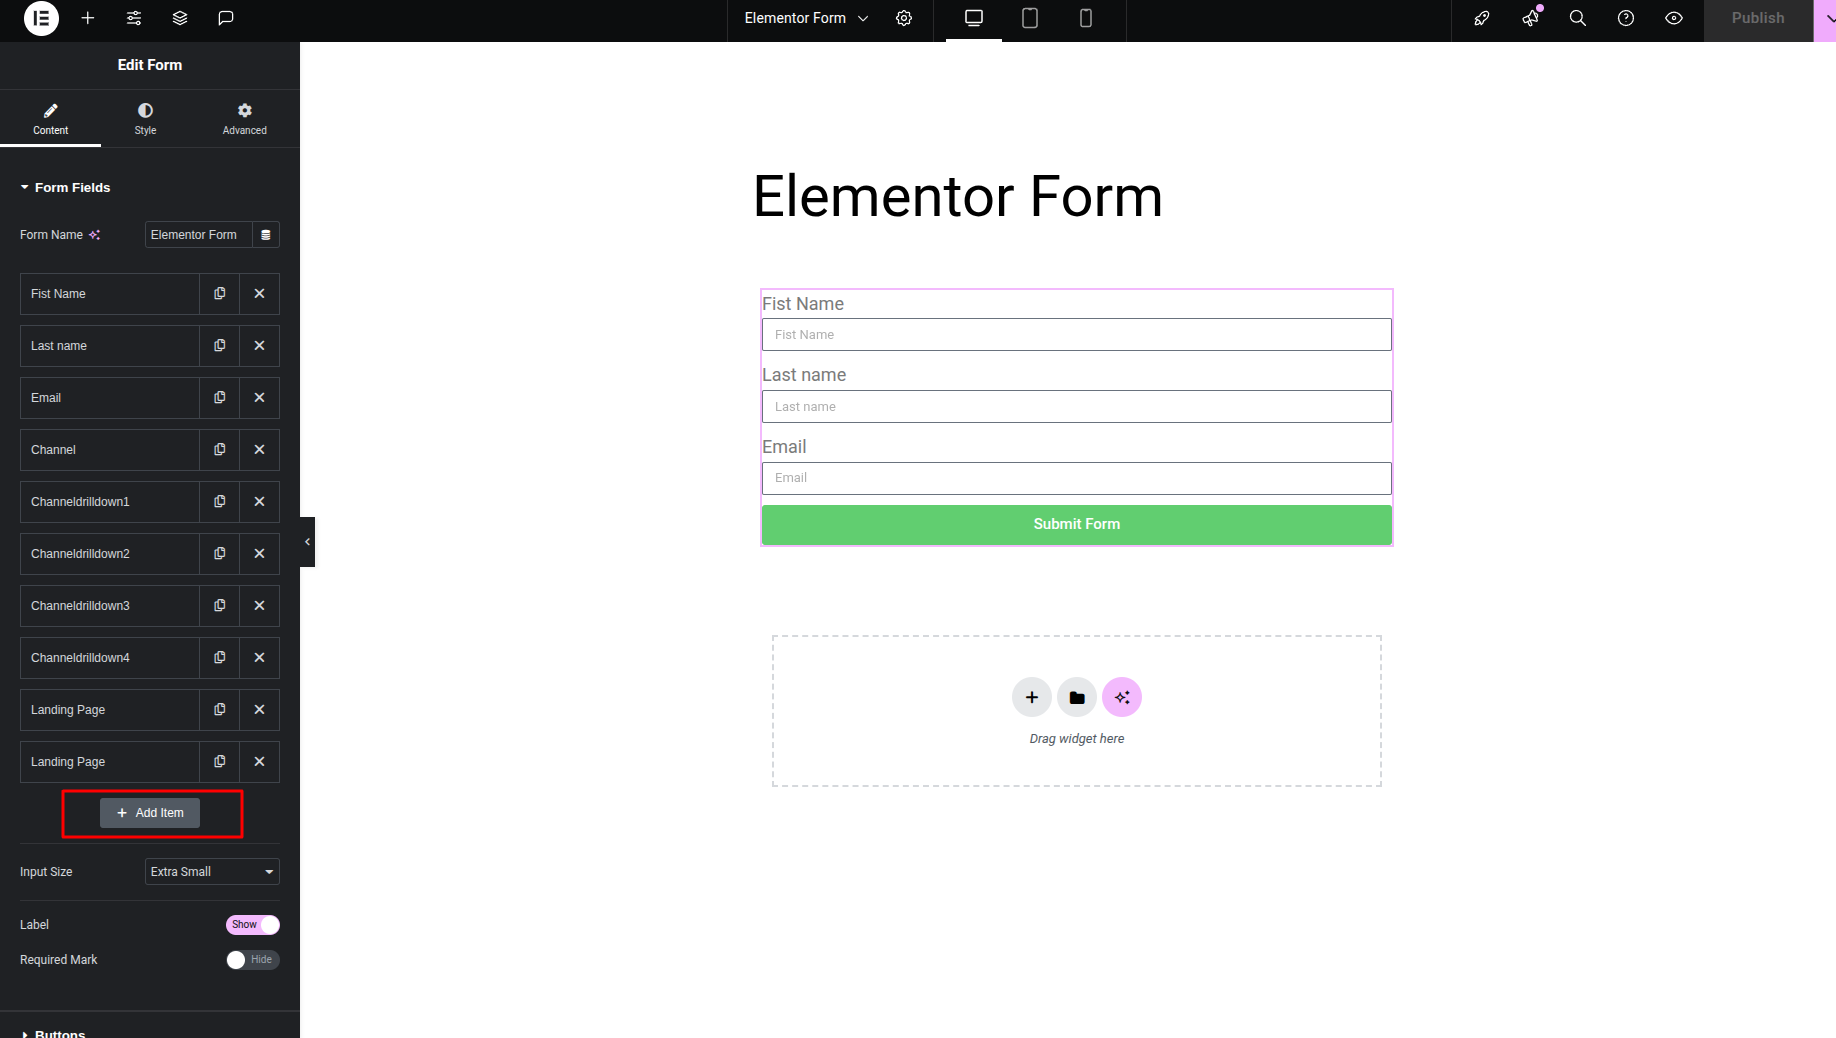
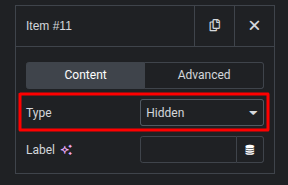
- Set the Type to Hidden.
- Name the field (e.g.,
channel,channeldrilldown1,channeldrilldown2,channeldrilldown3,channeldrilldown4,landing_page,landing_page_groupetc.).
- Enable Dynamic Tag to populate it.
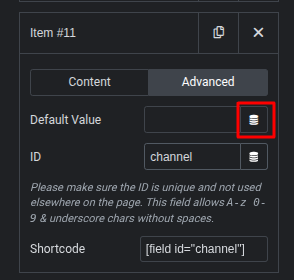
- Click the database icon next to the Default Value.
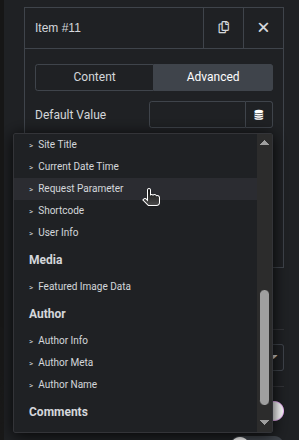
- Choose Request Parameter → populate from URL query string.
Example
To capture channel from the URL ?channel=linkedin, configure the field like this:
- Type: Hidden
- Name:
channel - Default Value → Dynamic Tag → Request Parameter → Key:
channel
Repeat this for other parameters like channel, channeldrilldown1, channeldrilldown2, channeldrilldown3, channeldrilldown4, landing_page, landing_page_group.
These hidden fields are included in the form submission and passed to integrations or email notifications.
Step 5: How Elementor Forms Connect to a CRM
Method A: Built-In Integrations
Go to the Actions After Submit panel and select:
- Mailchimp
- HubSpot
- ActiveCampaign
- Drip
- GetResponse
- ConvertKit
After choosing the service, a new settings tab appears to map form fields to CRM fields.
Method B: Webhook to External CRMs
- In Actions After Submit, select Webhook.
- A new Webhook tab will appear.
- Paste your CRM’s endpoint URL (e.g., from Zapier/Make or a custom API).
- The form will send JSON data to this URL — great for CRMs like Zoho, Salesforce, Pipedrive, and others.
Step 6: How to Use Elementor Forms as an iFrame
Elementor forms are typically embedded directly on WordPress pages, but you can embed the page as an iframe on external websites if needed.
Step-by-Step
- Create a standalone WordPress Page with Elementor.
- Add your Elementor Form and publish the page.
- Example URL:
https://yourdomain.com/form-landing/ - On an external site (e.g., a landing page builder, Shopify, plain HTML), embed this iframe:
<iframe
  src="https://yourdomain.com/form-landing/"
  width="100%"
  height="700"
  frameborder="0">
</iframe>
Pass Parameters into iFrame
If you want to track UTM or referrer values, add parameters to the iframe src and include data-attry-iframe:
<iframe
  src="https://yourdomain.com/form-landing/?utm_source=google&utm_campaign=fall2025"
  data-attry-iframe
  width="100%"
  height="700"
  frameborder="0">
</iframe>
In Elementor, make sure your hidden fields are dynamically populated using Request Parameter for keys like utm_source, utm_campaign, etc. These values will be submitted with the form and are useful for analytics, personalization, and CRM workflows.